Working with Plates
Creating a New Plate
To create a new plate, in the plates Overview section of an experiment, click on the blue + button (Create New Plate) in the top right corner of the table.
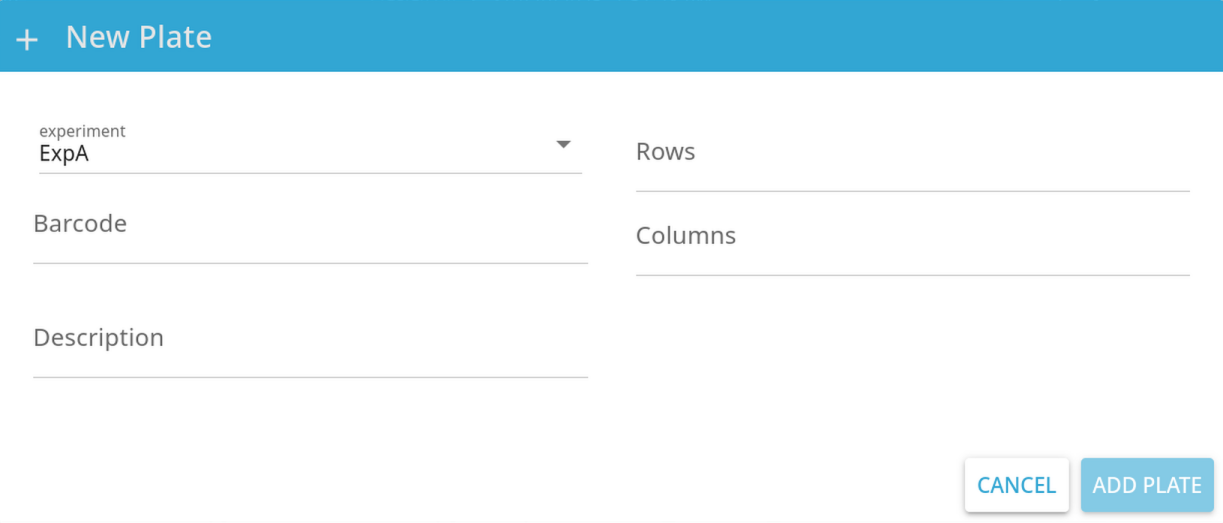
Note: Make sure to enter the correct plate dimensions! While you can modify most of the plate’s attributes afterwards, you cannot change a plate’s dimensions after it’s been created.
Viewing a Plate
To view the details of a plate, double-click on it in the Overview section of an experiment.
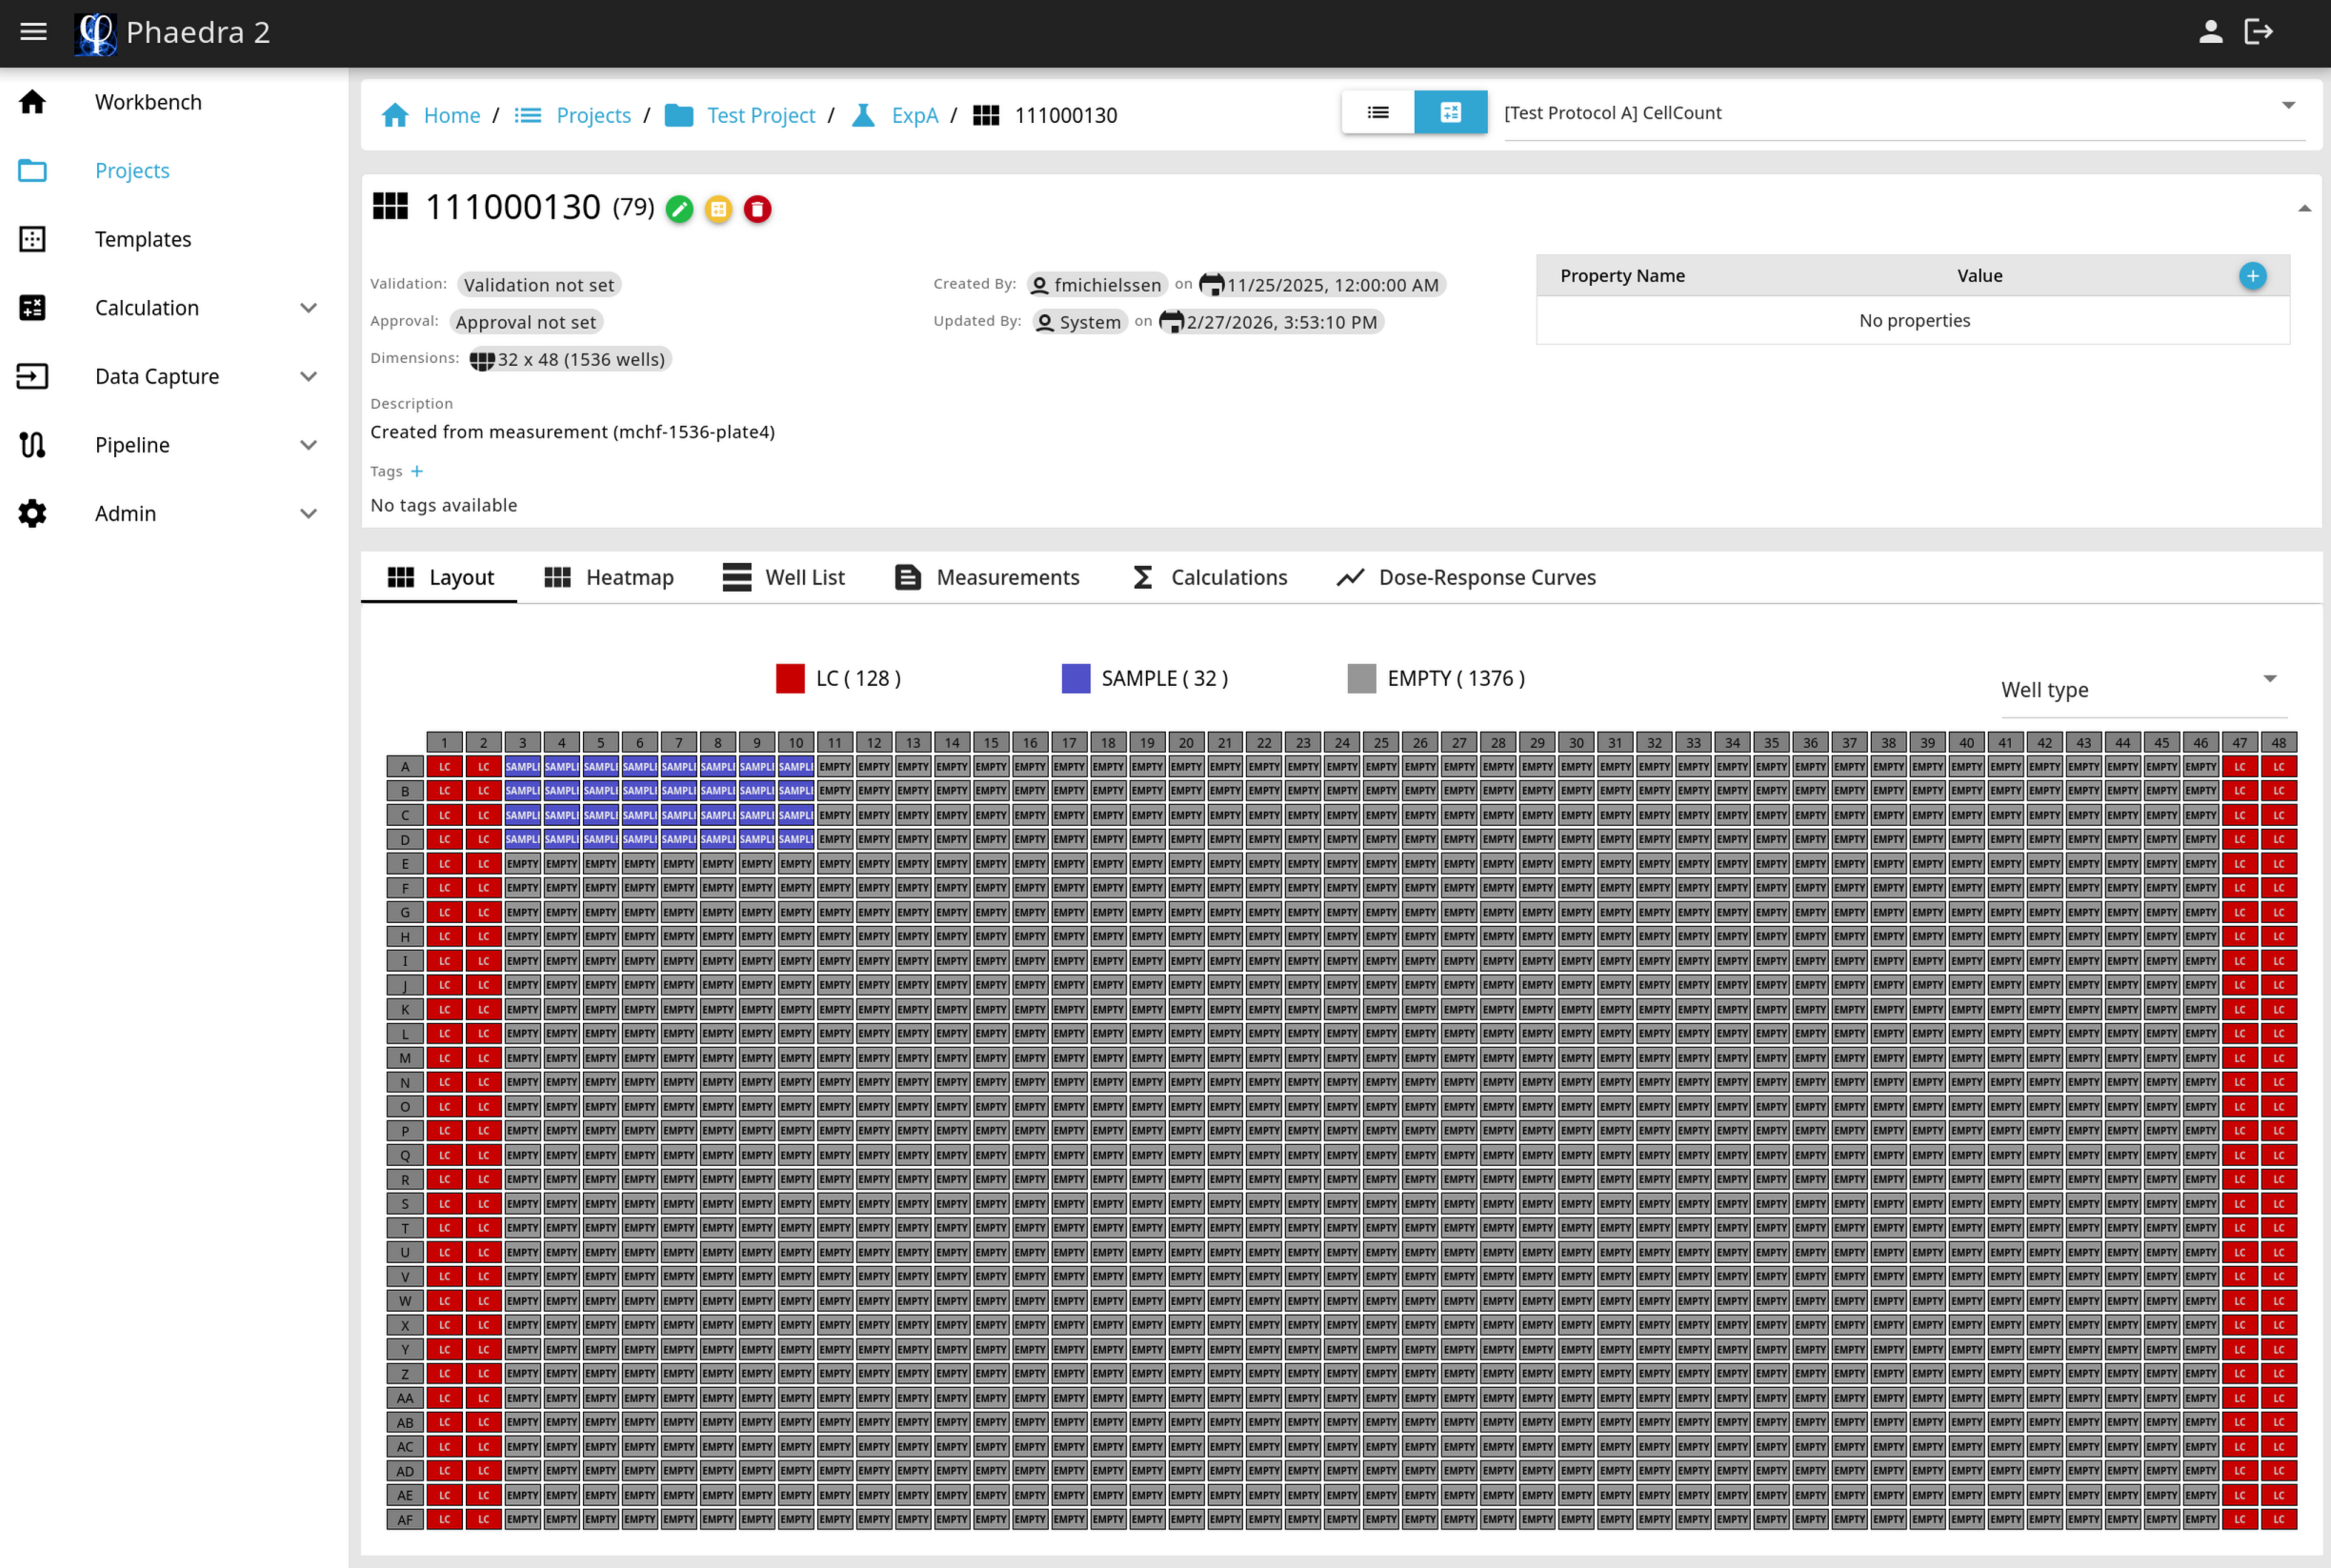
The top section of the plate view displays general information including the barcode, description, dimensions, validation & approval info, and tags and properties.
The bottom section is organized into multiple tabs, with each tab presenting the plate contents in a different way:
Layout
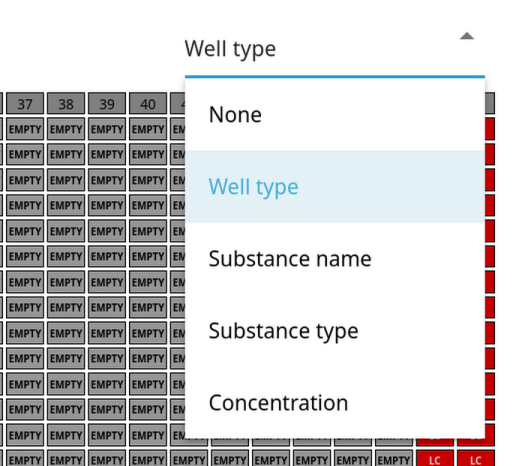
This tab displays the plate layout, if available. On each well, the Well type is shown, defaulting to “EMPTY” for wells that are neither controls or samples. To display another label, such as the substance or concentration, use the dropdown list in the top right corner of the plate.
Heatmap
In the Heatmap tab, you can view the plate’s feature data presented as a colored heatmap:
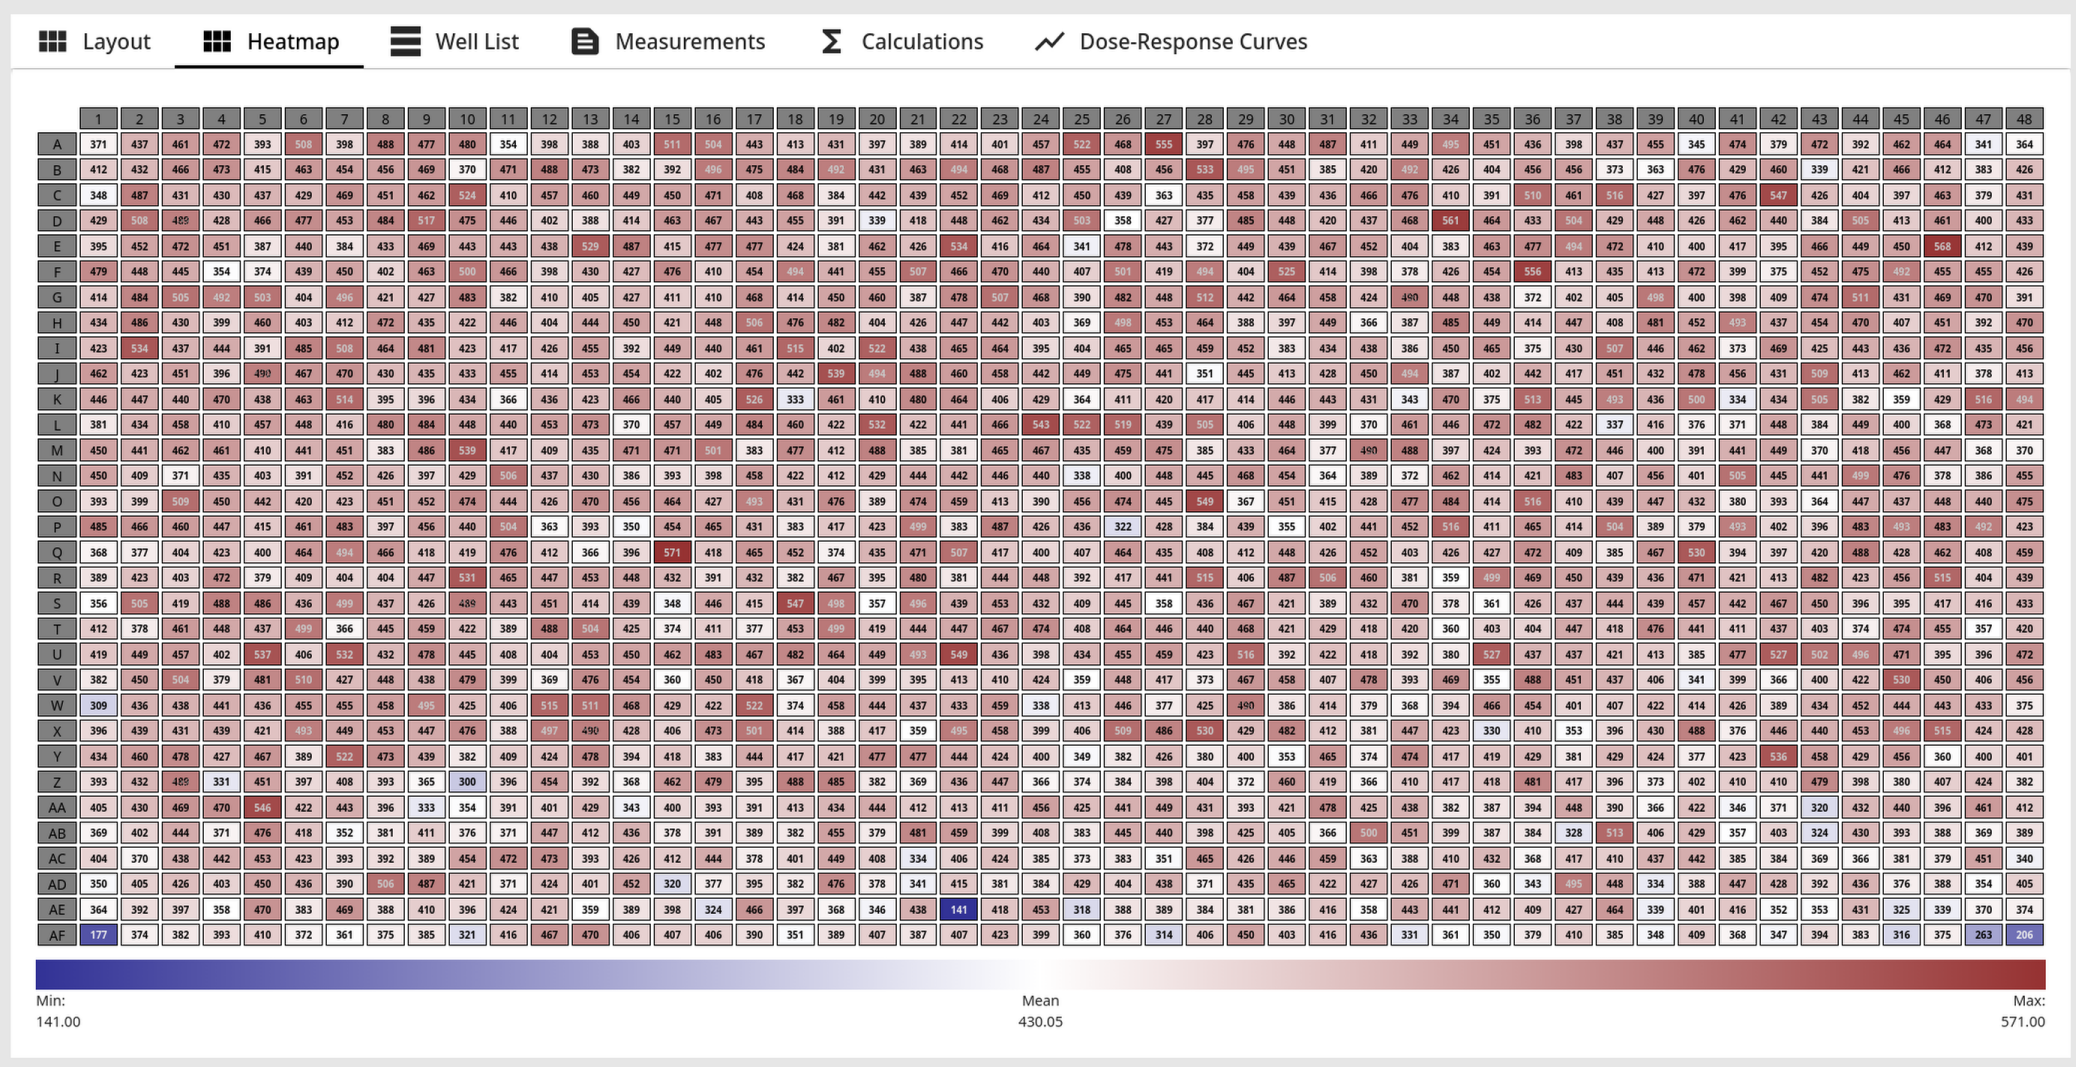
To choose which feature (or measurement column) should be displayed on the heatmap, use the Feature Selector which is located in the top right corner of the screen:

The Feature Selector has two buttons to toggle between Measurement Columns (data imported from measurement files) and Features (data calculated by Phaedra).
Note: For more information about features, refer to the Calculation topic.
Well List
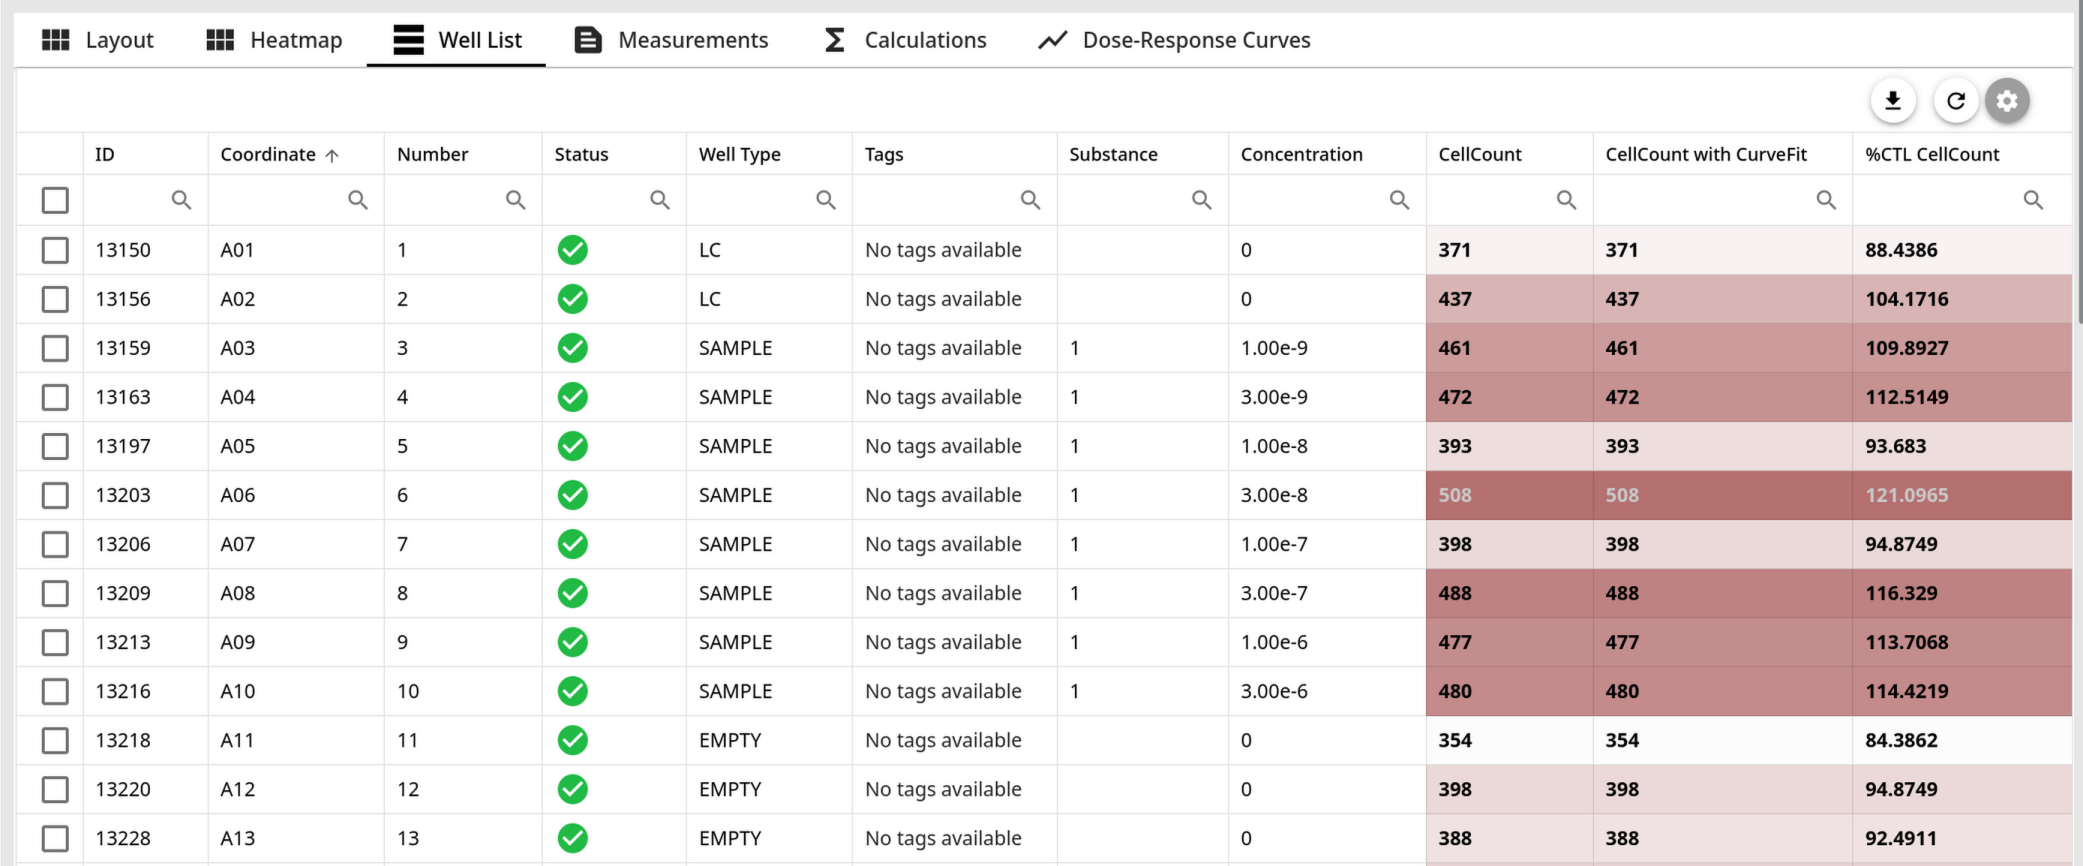
Instead of a heatmap or grid, wells can also be listed in a tabular format. The Well List tab presents such a table, where you can sort and filter the wells in a convenient way:
Measurements
Each plate typically has one measurement attached to it, although it is possible to attach multiple measurements to a plate (for example, in the case of a time-lapse assay). The measurements tab lists all the measurements that are attached to the current plate:

- To link a different measurement to a plate, click the Link Measurement button and select one of the available measurements.
- If multiple measurements are linked to a plate, you can toggle one of them as the active measurement using the Active switch in the first column of the table. The active measurement is the one that will be used by default during plate calculations and for data visualizations.
Note: Manually linking measurements to plates can be a tedious process. Pipelines are designed to automate such tasks and are the recommended way to go, especially in larger projects.
Calculations
The Calculations tab shows a list of all the calculations that took place on the plate, along with information about the outcome of those calculations.
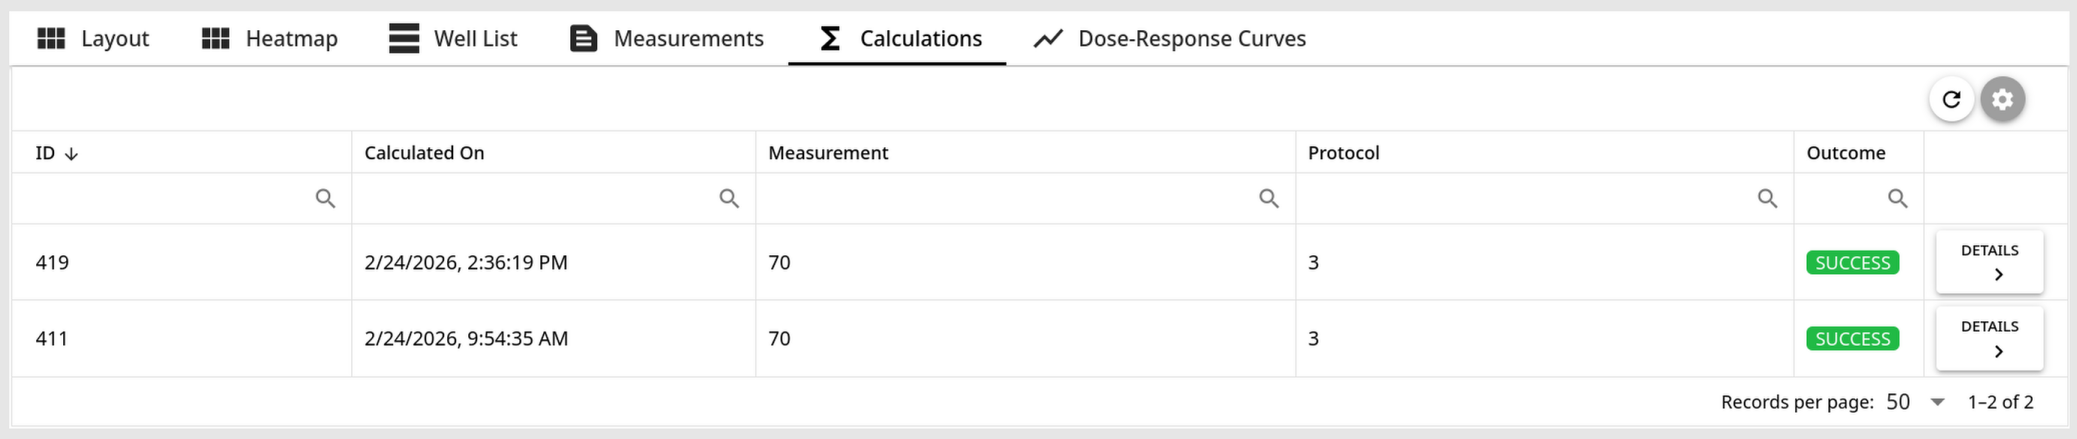
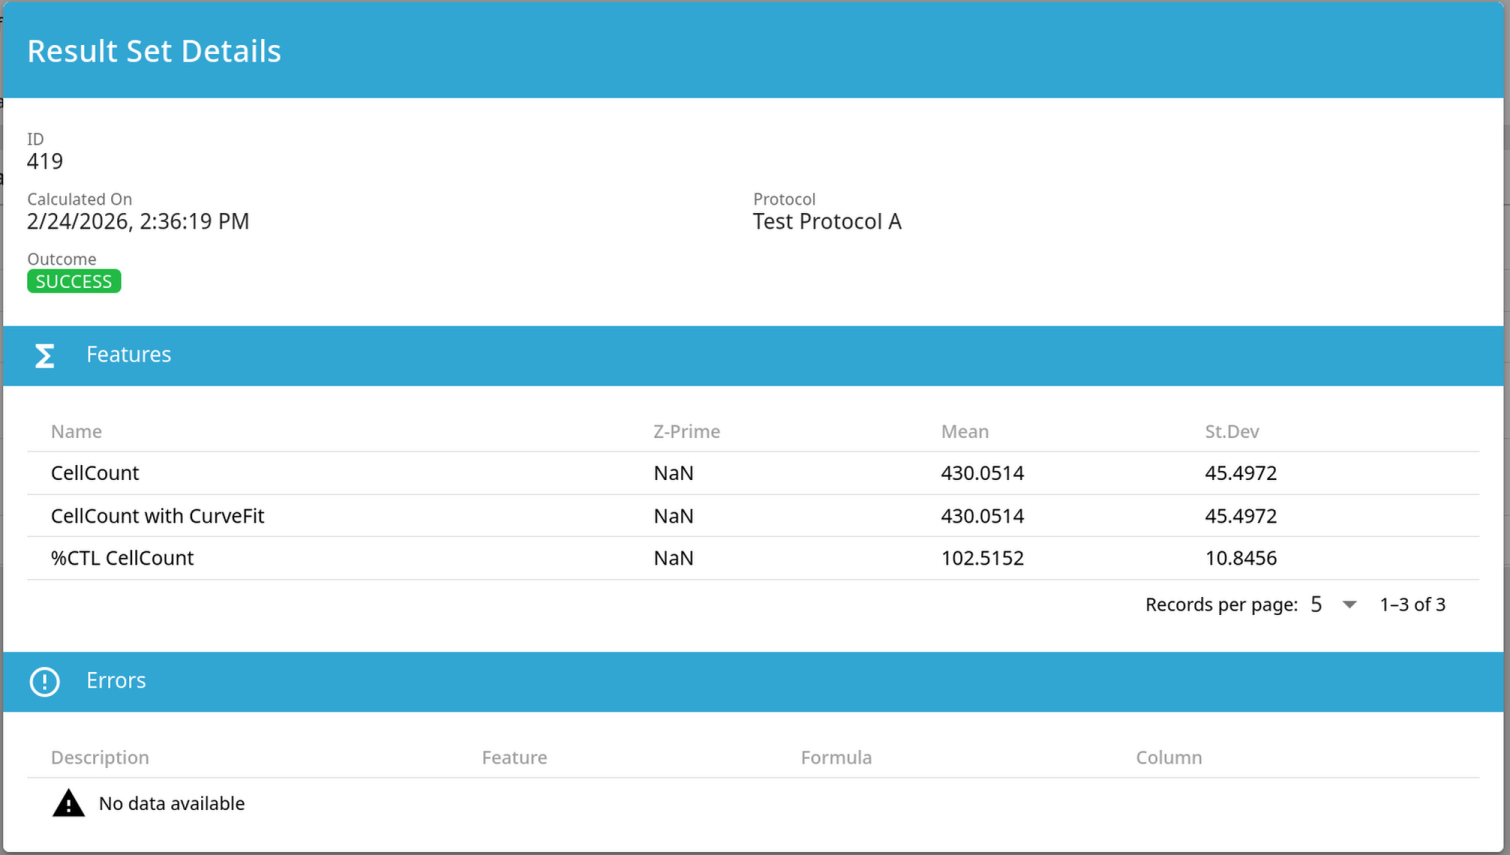
Click on the Details button to see more details about the calculated features and the errors, in the case of a failed calculation.
Dose-Response Curves
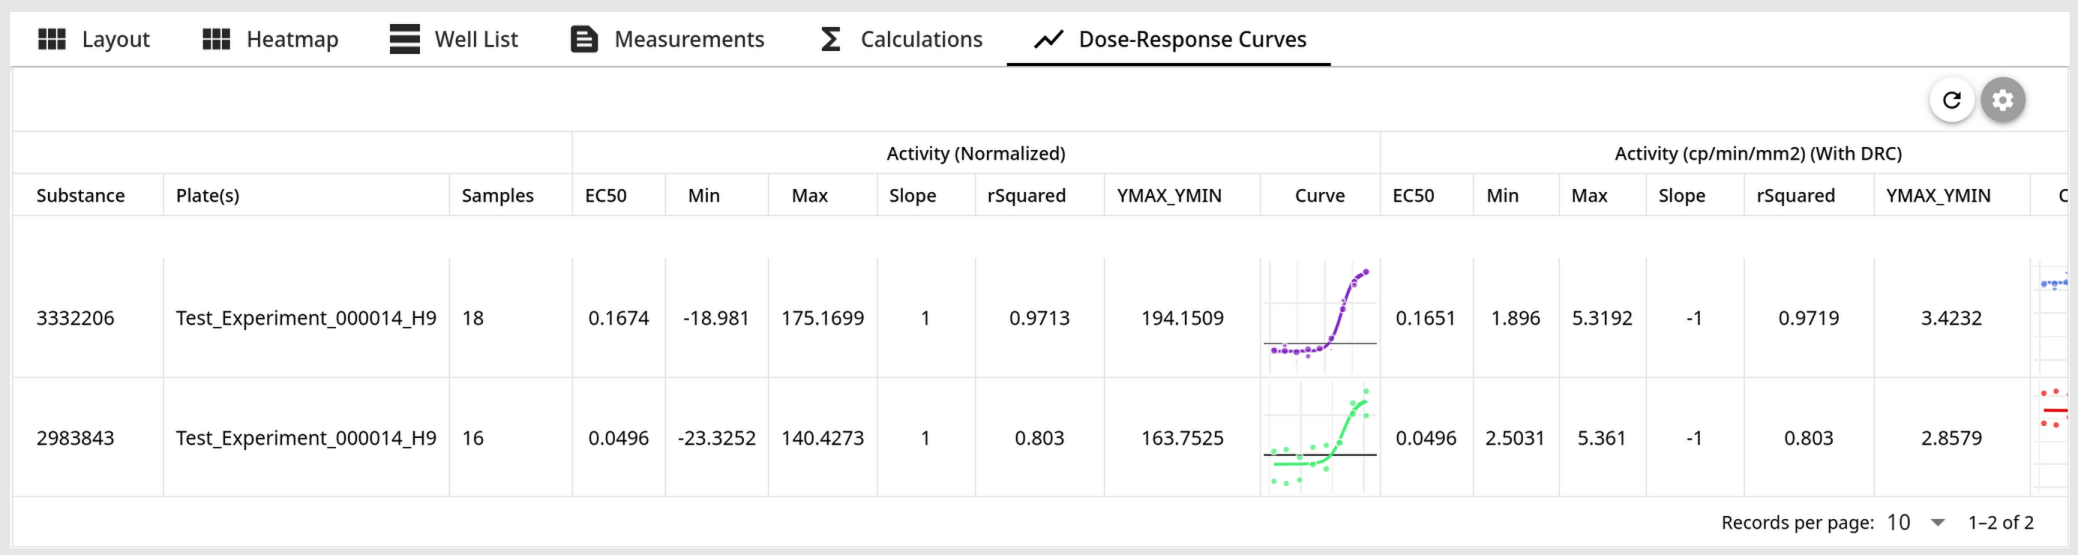
If any dose-response curves were calculated on the plate, they will be shown in the Dose-Response Curves tab:
Editing a Plate
Plates can be modified in many different ways, ranging from a simple rename of the barcode, to a full recalculation of all features. Before a plate can be edited, though, two main conditions must be met:
- You must have Write permissions on the project
- The plate must not be Validated or Invalidated
If these conditions are met, you can edit a plate in the following ways:
In the plate view:

- Click the Pencil button next to the plate’s barcode to edit the barcode or description.
- Click the Calculator button next to the plate’s barcode to perform a recalculation of the plate.
- Click the + button next to the Tags field to add a tag.
- Click the + button in the top right corner of the Properties table to add a property.
In the experiment view:
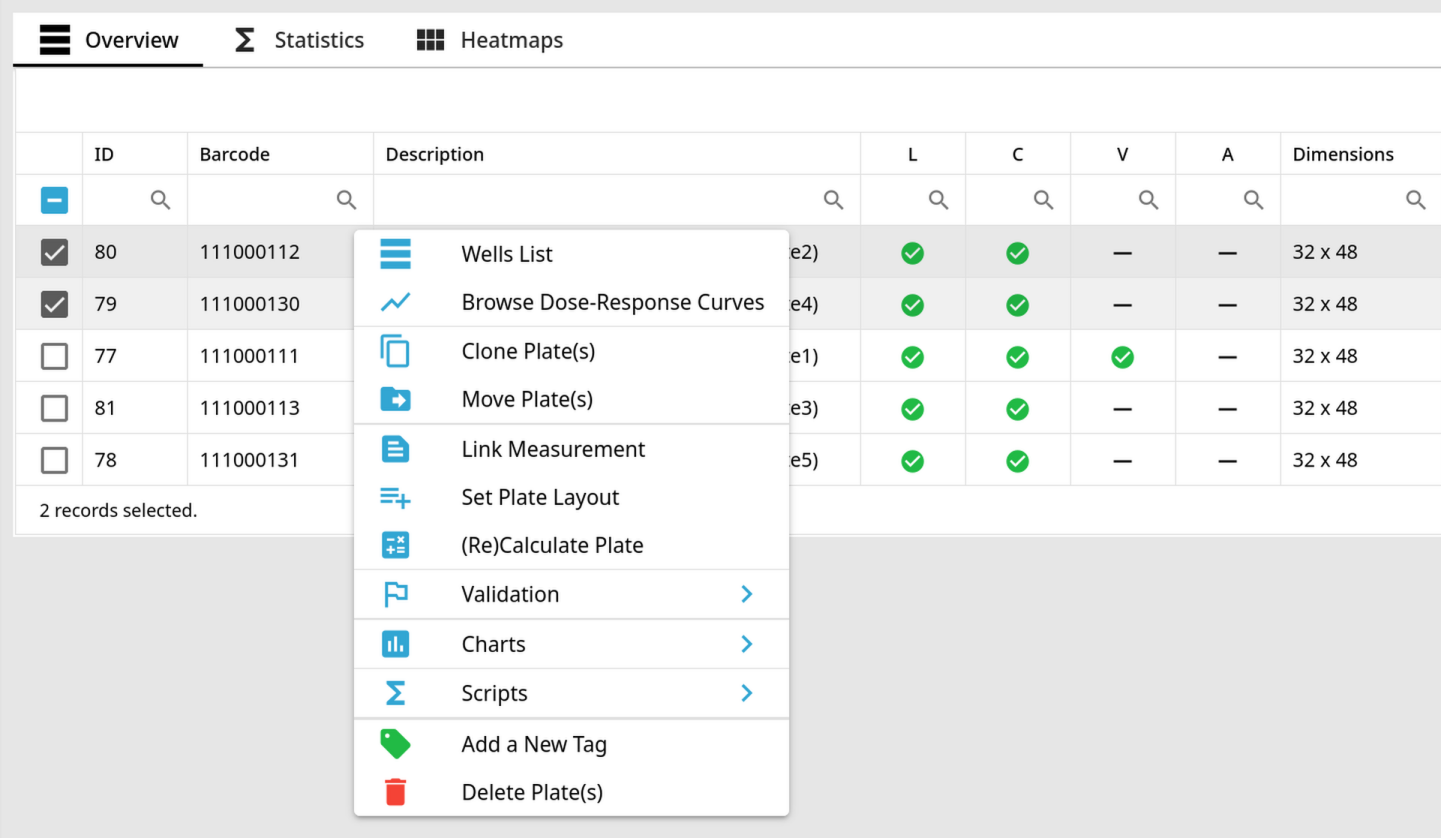
Right-click one or more plates and choose an action to perform:
- Clone Plate(s) to create exact copies of the plates
- Move Plate(s) to move plates to a different experiment in the same project
- Link Measurement to link an available measurement to the plates
- Set Plate Layout to apply a plate layout template to the plates
- (Re)Calculate Plate to perform a recalculation of the plates
- Validation to Validate or Invalidate the plates, or to reset their validation status
- Approval to Approve or Disapprove the plates, after the plates have been Validated
- Charts to open one of the available charts that can display the plates’ feature data
- Scripts to choose and run one of the available scripts (from the Script Catalog) on the plates