Setting up a Protocol
Creating a Protocol
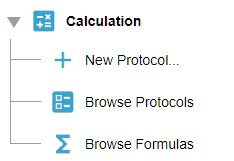
- In the Navigator, select Calculation.
- The folder will expand. Select New Protocol…
- Provide a name for the new protocol, and optionally a description. Also, select the welltype codes that should be used for the well types Low Control and High Control. Finally, choose a starting version number. Note that version numbers must match the pattern “#.#.#” containing three numbers: MajorVersion.MinorVersion.Revision.
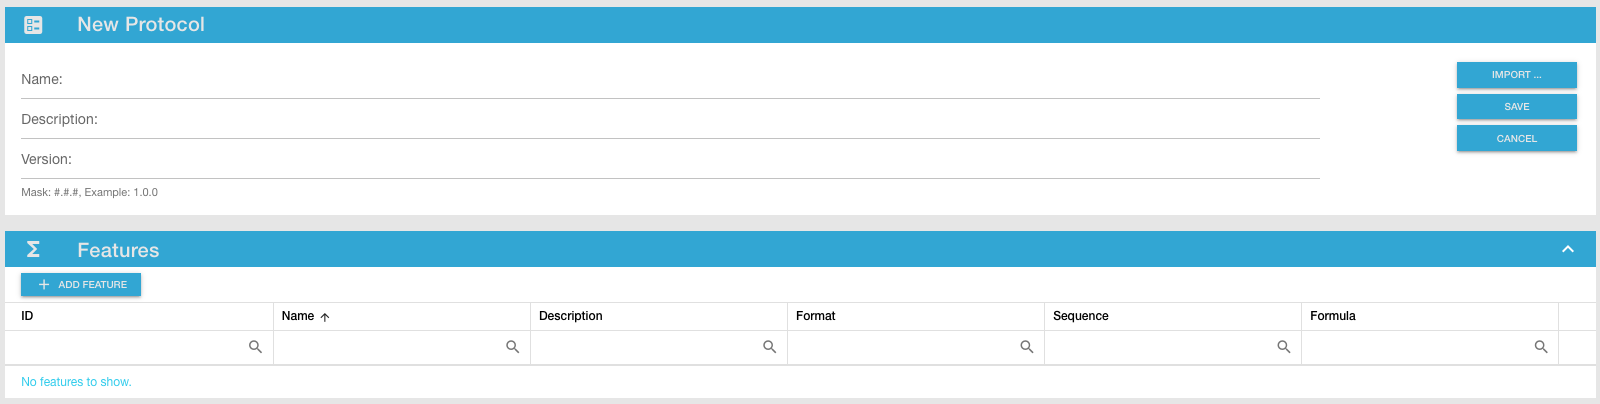
When you select Save, the protocol will be created and you will be taken to the Protocol View.
Creating a Protocol using an exported JSON file
Instead of creating a new protocol from scratch, you can also create one as a copy from another protocol, by exporting an existing protocol using the Export button, and then selecting Import… in the protocol creation screen.
Viewing a Protocol
To view a protocol, select Calculation in the Navigator and then select Browse Protocols. A table will be shown, listing all available protocols. Click on the protocol you want to view.
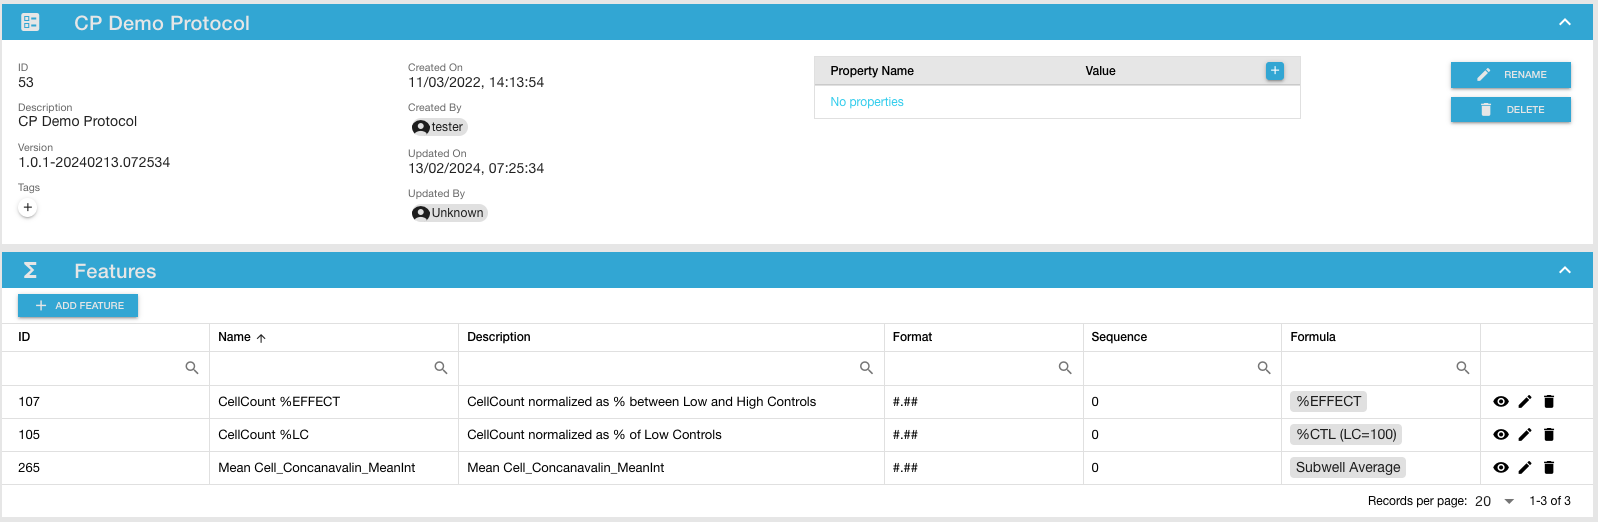
The top section displays general information about the protocol, such as the name, modification date, version number, as well as tags and properties.
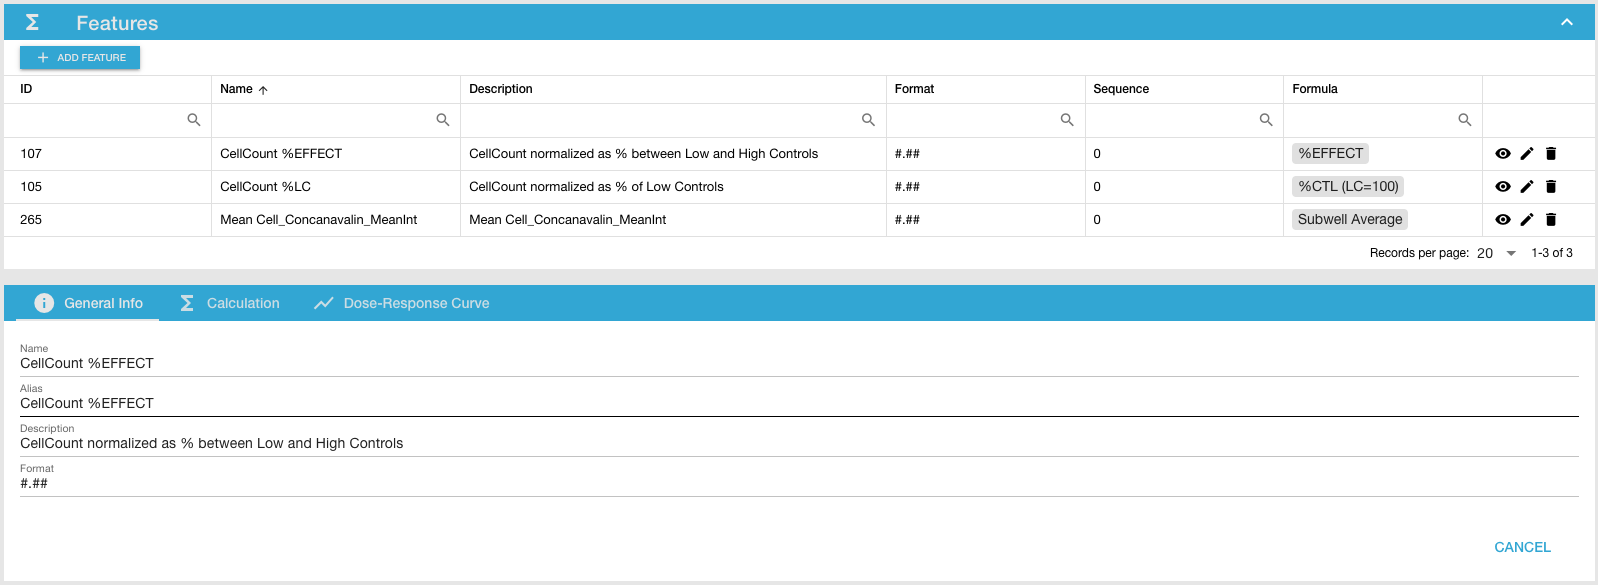
The bottom section shows a list of all the features that have been defined in this protocol. Click on view button in the far right column to open a third section containing detailed information about the selected feature.
Editing a Protocol
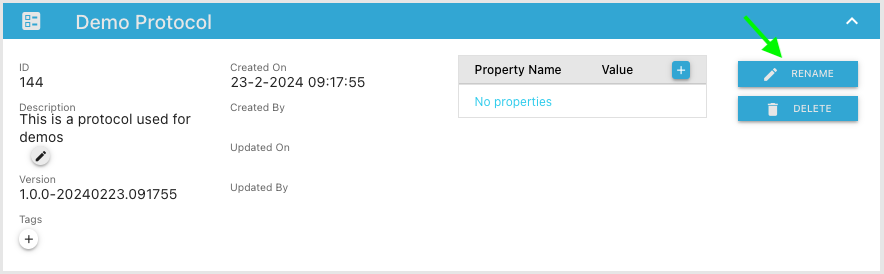
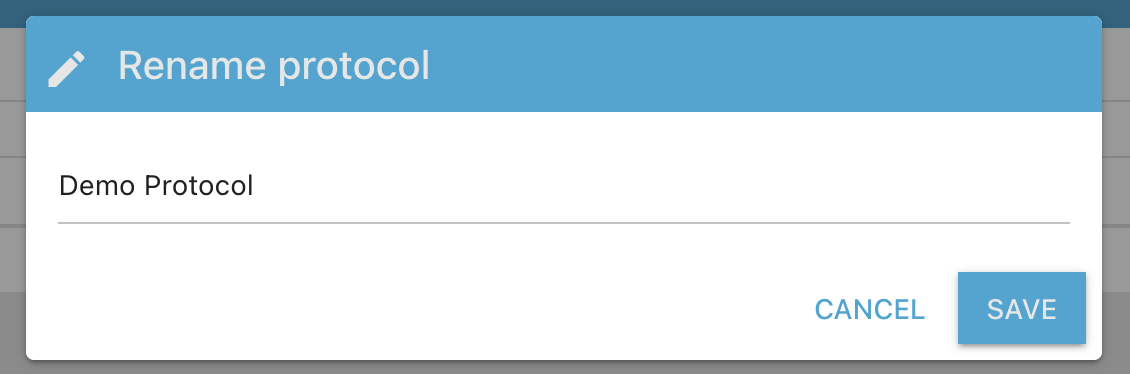
Rename protocol
To rename the protocol click on the RENAME button:
A “Rename protocol” dialog will appear where you can edit the protocol name:
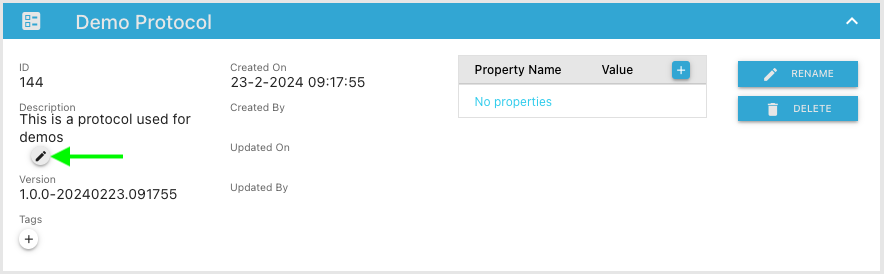
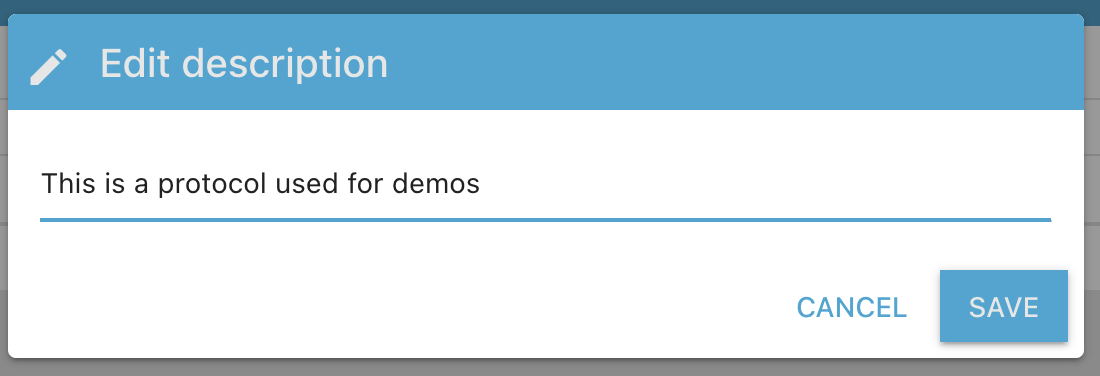
Edit protocol description
To edit the protocol description click on the edit icon next to the protocol description:
A “Edit description” dialog will appear where you can edit the protocol description:
Add/Delete Tag
To tag the protocol click on the plus icon next to tags label
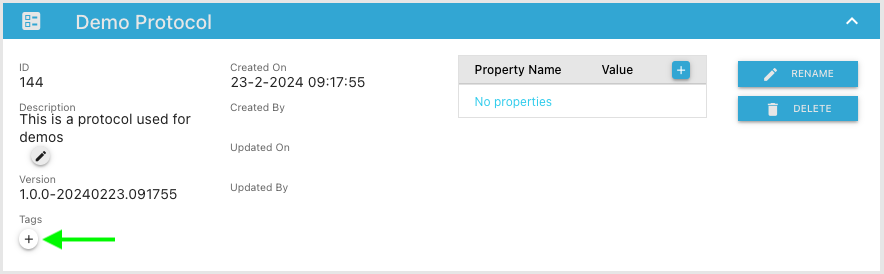
An “Add tag” dialog will appear similar to “Rename protocol” and “Edit description” where you can input a tag To delete a tag click on the ‘x’ icon next to the tag that you want to delete
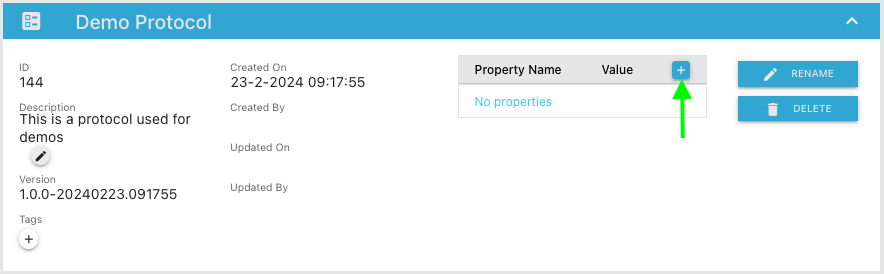
Add/Delete Property
Add Feature
To Add a new feature to the protocol click on “ADD FEATURE” button in the upper left corner of the feature list view.
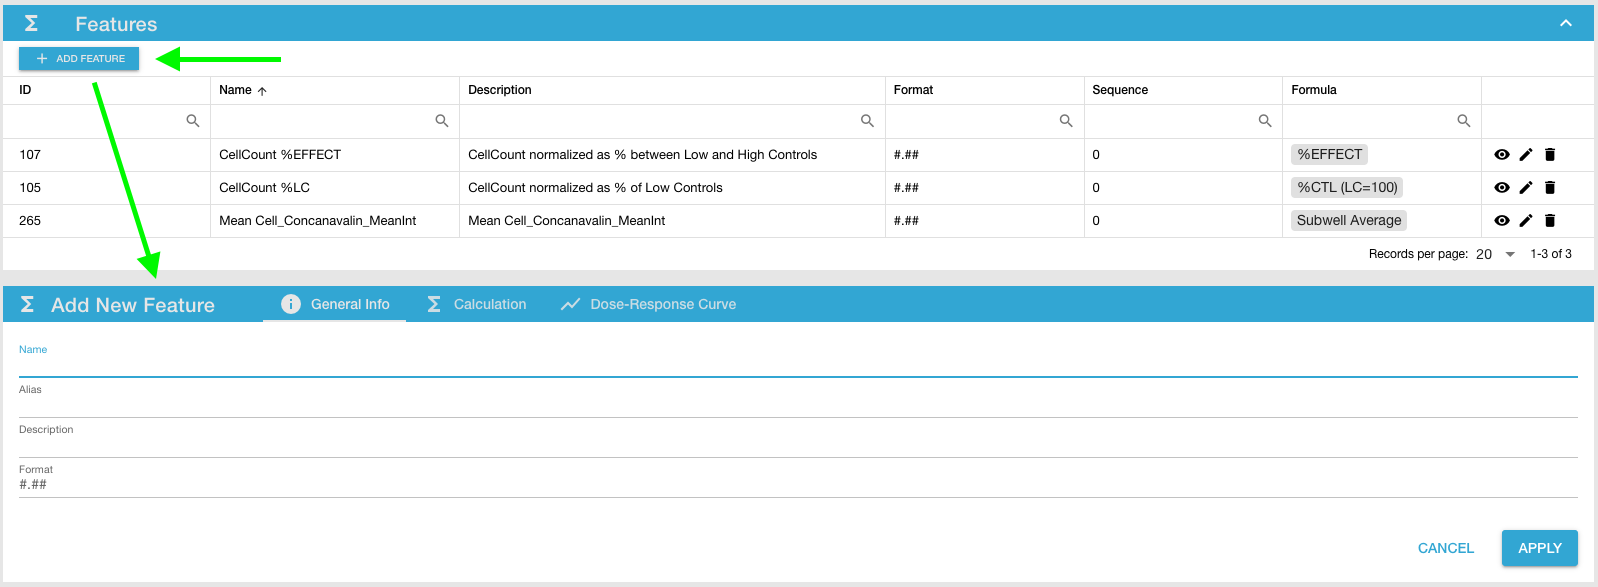
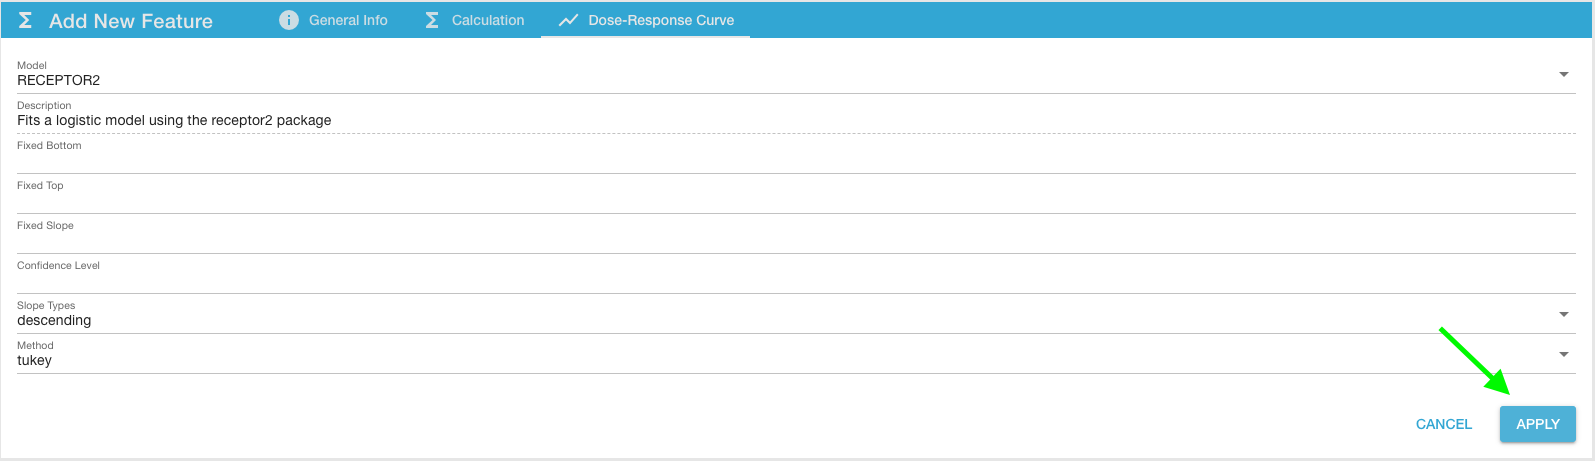
A third section “Add New Feature” will appear with tree main sections: “General Info”, “Calculation” and “Dose-Response Curve”. In the first section the user needs to provide general information like feature’s name, alias, description and format (default is set to #.##).

Because every feature created in a protocol is a calculation feature (meaning the feature executes a function when the protocol is applied a specific plate), the calculation needs to be filled in by the user. The user needs to select a calculation formula and provide a column name (or names depending on number of function inputs) from a specific measurement or name of a other feature from the protocol.


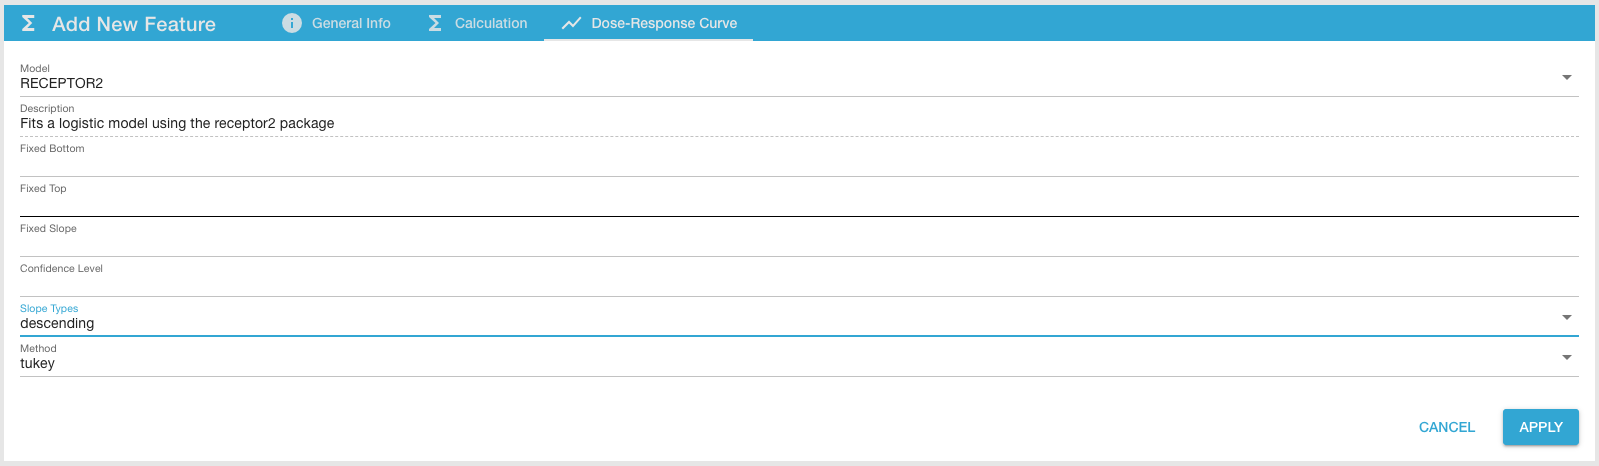
The third section is optional and only needs to be filled in by the user when a dose-response curve needs to be fitted for the new feature.
After all the mandatory information about the new feature is provided, click on the APPLY button in the lower right corner of the new feature section. The newly created feature will appear in the protocol feature list section.
You’ll also notice two new buttons SAVE and RESET have appeared in the feature list section.

Click save if you want to SAVE the feature changes of click RESET to revert the feature changes.
Edit Feature
To edit a specific protocol feature click on the edit button on the far right column in the feature list section.

Alle the other actions are similar to the add new feature action.
Delete Feature
To Delete a specific protocol feature click on the delete button on the far right column in the feature list section.

Everytime you Add, Edit or Delete a protocol feature, the SAVE and RESET buttons will appear. To persist the feature changes you’ll need to click the SAVE button and to discard the feature changes you’ll need to click the RESET button.
Browsing Formulas
To browse the available formulas:
- In the Navigator, select Calculation.
- The folder will expand. Select Browse Formulas
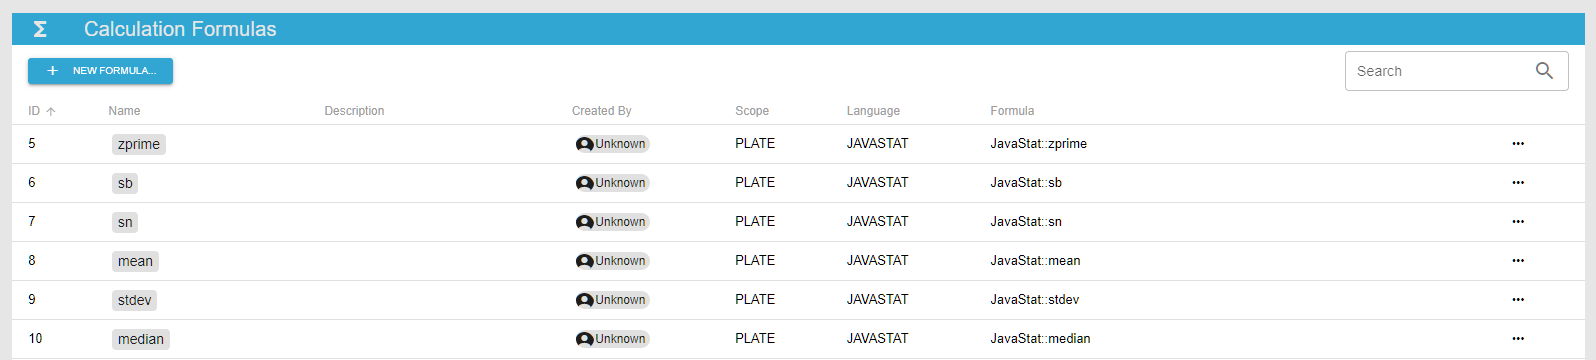
A table will list the available formulas, showing some basic information for each formula, such as the name, author, scope and language.
To see more detailed information, either click on a formula, or click on the “…” icon and select Details.
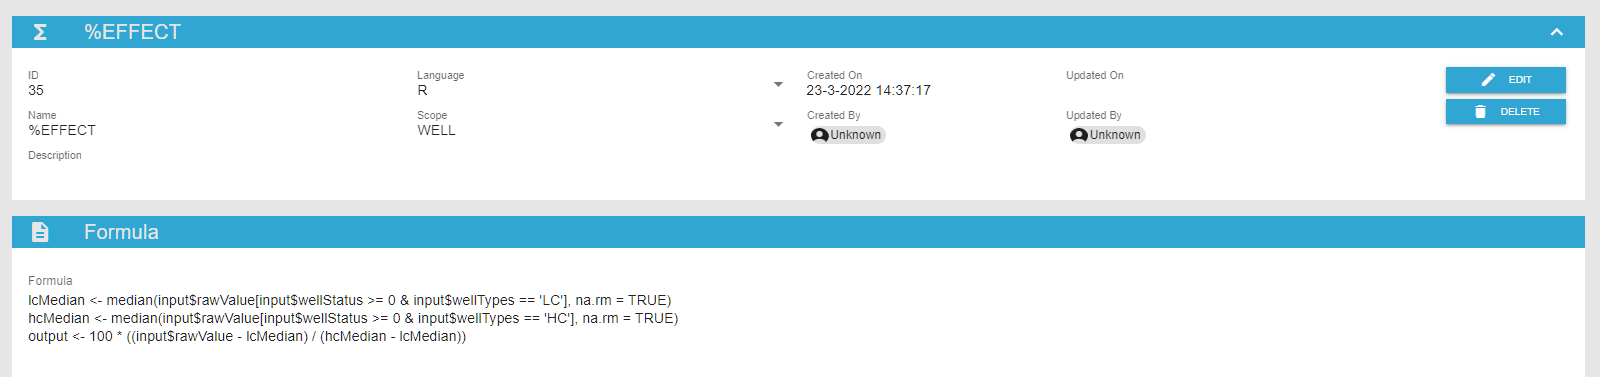
The top section will display general information about the formula. The bottom section will display the formula script.
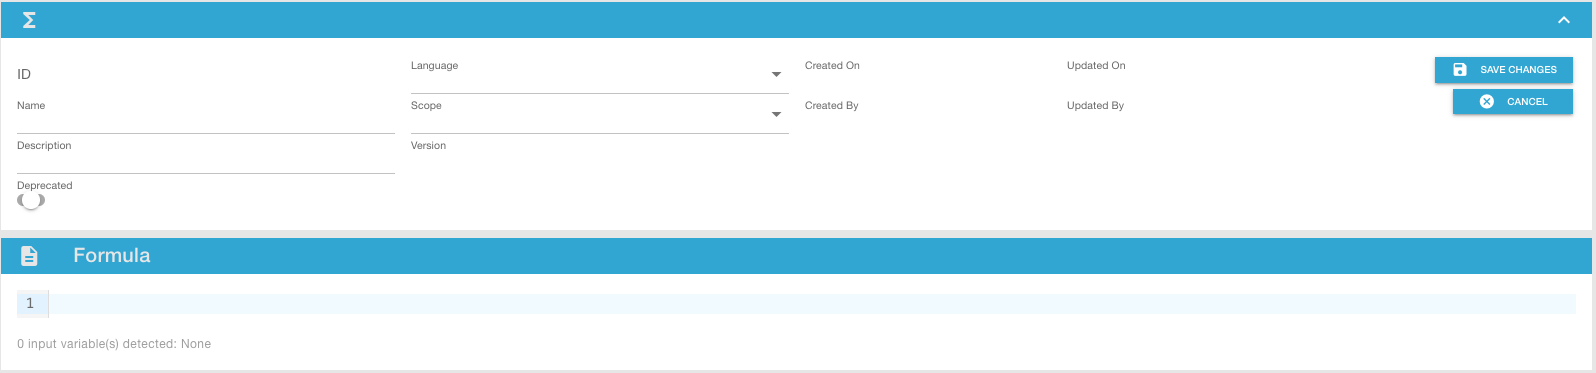
Editing a Formula
To edit a formula, open a formula and select the Edit button in the top right corner.
You can then modify the formula name, description, scope as well as the formula script itself. When you are done making changes, select Save Changes to apply the modifications to the formula.
Creating a New Formula
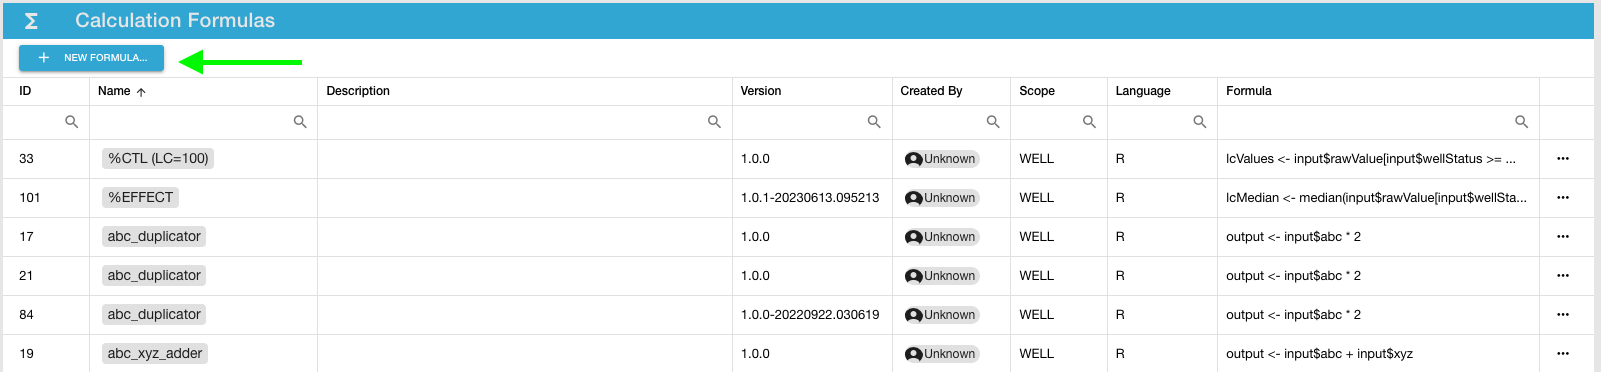
To create a new formula, open the formula browser and click the NEW FORMULA… button.
A new formula view will appear. The view is split into two sections:
On top is the general information section where the user provides information like:
- Name: formula name
- Description: description of the formula
- Language: the scripting language
- Scope: plate level, well level or sub-well level

Below it is the script section where the user provides the script that implements the formula’s function:
